Monday, July 4, 2011

Latest bedroom update

The last time I updated you on our master bedroom was back in March, and we've come a long way since then!

If you'll remember, the bedroom when we first moved in was kind of a huge mess and required a ton of sanding and painting:


We finally got it live-able, but I still wasn't crazy about our bedroom furniture, which we bought at Ikea when we first moved to LA almost four years ago.  The very utilitarian Ikea stuff was cheap and we've definitely got our money's worth by now, but I was itching to update it.  That said, bedroom furniture wasn't even at the top of my list because we have so much else to buy.

Then it happened.

My luckiest craigslist week ever.

I wasn't even looking, but my dream bedroom set came and found me.  To give a little bit of back story - a long while back, Sean and I spent the afternoon poking around furniture at the Helms bakery district right down the road from us in Culver City, which houses tons of furniture stores like Plummers, Environment, H.D. Buttercup, and other places way out of our price range.  If you're a fatty like us, they also have some awesome food like the burgers at Father's Office and some amazing french onion soup at La Dijonaise which is perfect after a day of furniture window shopping.

I digress.  On this particular trip, we stopped into Room and Board to check out some of their beautiful furniture.  I love that Room and Board is always described in design sources as "affordable," because it's most certainly not, at least not to two cheapos like us.  It was on this trip that I discovered the Calvin bedroom furniture, which I became oddly obsessed with, particularly the night stands. 

Photo credit: roomandboard.com


I honestly can't said there's anything special about these pieces, I just loved the look and the clean lines.  Not to mention that the craftsmanship is really amazing - most of their pieces are handcrafted and it shows.

The problem is that there was no way I was spending almost $1,100 (including tax) on a pair of night stands.  I thought about saving up a few times and splurging, but I just couldn't.  It is, after all, just a nightstand.

Then, one day during my normal craigslist trolling for cheapo nightstands for the guest house, I stumbled upon a listing for 2 Room and Board Calvin nightstands, PLUS a 6-drawer dresser.
Photo credit: roomandboard.com

The price?  Not cheap by any means, but less than what we would have spent on the nightstands alone, and less than 30% of retail price.

You might say I flipped out.  I called the guy immediately and tried to contain my glee as I arranged to come look at them that night.  It turns out the guy was moving to Brazil (or Costa Rica or something, I was too busy obsessing over the furniture to pay attention) and was getting rid of his entire apartment's worth of beautiful high end furniture. 

I originally pondered just buying the nightstands, but the guy wanted to keep them as a set and since the price was so good I figured why not?  The guy wouldn't budge on his listed price, but he ended up delivering it for us in his Bronco which sweetened the deal because otherwise we would have had to rent a van and dealt with that whole hassle. 

I had dreamed of a mid-century modern dresser for the bedroom but I've never seen anything I like that's been even close to the price of what we paid for this almost-new Room and Board dresser.  I'm not sure I love a matchy matchy bedroom, but it'll do for now.  Plus, I'm pretty confident I can sell the dresser for almost what I paid for the whole set.

So, home we came with our Room and Board bedroom set, which was in almost-perfect condition.  There are a teeny few dents here and there, but nothing worse than what I'd incur in about 2 months of owning it anyway.

Remember how I said it was a lucky week?  Well, only a few days later, I found my dream headboard online. 

Similar to the Room and Board set, I've been drooling over the Crate and Barrel Porto Bed for a while, but have been too cheap to actually pay for it without some kind of super sale. 
 
Photo credit: crateandbarrel.com

Plus, Sean is totally against the idea of a footboard even though I love the look (and at 5'2" on a good day, a footboard is not really an issue for me).  Even just the headboard was almost $400 with tax, so I put it out of my mind and we've been sleeping on our plain metal bed frame for as long as we've had our bed.

Until...you guessed it...I found a Porto headboard on craigslist. 

For $50. 

Insane, right?  I dragged Sean into the car for another night of furniture hunting, and we even managed to cram the headboard into the trunk of my Volvo with the help of some bungee cords.  I was dead set on not renting the truck because it would make the $50 headboard deal a little less sweet.

It's also a great compromise because I get the headboard I want, Sean doesn't have to deal with a footboard.  I'm not in love with the idea of the bedskirt to hide the ugly metal bed frame, but it works.  Everbody's happy!  Compromise leads to a happy marriage.

So, after all that back story, here's some updated bedroom pictures!


I also snagged a new duvet cover - the organic pintuck duvet from West Elm.  It totally seems like I'm on a spending spree, huh?  Keep in mind that these purchases are over the course of 3 or 4 months, I swear I'm not spending every waking hour shopping.  I've had my eye on the pintuck duvet for a while, so I took advantage of their earth day sale on all organic bedding, plus a 15% coupon they sent me, and got an awesome deal (I think the entire set ended up being around $60).  You may notice a theme that I never buy anything unless it's wayyy cheaper than retail price.  It's an obsession.


We still need to do something about the ugly doors, but let's focus on the pretty furniture for now.  And the rogue flip flop.


Aerial view - I'm standing on my new dresser for this one, oopsie!  This photo actually gives a great representation of our new floor color as well, for some reason it always comes out really orangey-yellow in pictures.


Another angle - my vanity is still hanging out in the corner.


I also finally put up curtains!  In this shot I'm showing how they wonderfully hide the ugly pull that removes the bars from the windows in case of a fire or some other awful event. 

The curtain installation was a total disaster.  We have hollow plaster walls, and after waiting months to put up curtain rods, I found that where I wanted to hang these curtains was particularly hollow.  Meaning that whenever I tried to screw in the rod, even with a special type of screw, I kept ending up with giant holes in the bedroom wall.


Let's just say this debacle ended with me in tears after several trips to Home Depot, and for the sake of my sanity Sean took over and now we have curtains!  After toying with the idea of patterns, we went with the plain old Ikea Vivan curtains.


I don't usually keep my stuffed animals out, and I'm not sure why I left them in this picture, but they're cute, right?  That's Lambie on the right and Noogie on the left.


View from standing on the bed.  Luckily when I hung the curtains at ceiling height, they were just long enough to skim the ground so I didn't have to hem them.  This is especially lucky because I have curtains in the living room from months ago still waiting to be hemmed.


Another view of curtains, since I'm seriously so glad they're finally up.  I think these curtains are just thick enough that we don't need extra blinds, and if not our next door neighbors get a show every time I change.


Where my Room and Board obsession started.


So, that's it for bedroom updates for now.  I don't envision any major changes any time soon, other than adding some wall art and possibly switching out the bedside lamps if I find something I like.  For now, I'm loving the bright and airy bedroom, it's really a great place to relax (and sleep!)

Creating an Office: Part II

Pardon my absence, after a long weekend away and a loooong week at work trying to catch up on what I missed, I barely had a chance to eat and sleep, nevermind update.

Although there's some more recent updates to share (get excited!) I figured I'd finish up our little office update.  See the first part of the office progress here.

Once my desk was finished, the only thing left to do was move it into the room and clean up all the junk that we'd been stashing in the office.

The desk finished product:


Not bad, right?  The iMac is actually Sean's work computer, but he brings it home for the summer so that he doesn't have to worry about theft.  I'd actually love to get an iMac of our own at some point.  I'm not the biggest fan of mac computers (even though I have and love an iPhone and an iPad) but I looooove the aesthetics of this computer.  Beautiful form, sleek keyboard and mouse, only ONE cord to deal with!?  SOLD!


A slightly different angle.  I stole these chairs from the guest house because they were the only matching chairs I could find.  They're not super comfy for long hours at the computer, but they'll do for now.  And they look pretty.  I love this Ikea Patrik chair in dark gray, but at $149 a pop it's not a purchase I'll be making any time soon.


I got rid of our file cabinet a while back because it seemed to take up a lot of unnecessary space, and switched to these file boxes I saw on Young House Love.  I love them!  These days almost everything is online (insurance paperwork, mortgage documents, etc.) so the amount of paper that is actually necessary to have around is very low.  I think these look way cuter than a clunky file cabinet.

I picked up this cheapo Solsta sofa bed on Craigslist for $40 or so.  It's a dead ringer for this Urban Outfitters version I've been eyeing for a while, but wayyy cheaper.  Normally I shy away from upholstery on Craigslist, but this was formally in a little girl's room in a ritzy house in Manhattan beach, so the ick factor was pretty low.  I wanted some small seating in the office, and I loved that this can fold out into a makeshift bed - we've actually already had guests sleep on it and they said it wasn't too bad. 

My biggest complaint is the upholstery.  There was a few marker stains on it that I tried to get off, which bleached the fabric and made it look way worse than when I started. Probably my bad, but I hate that the slipcovers aren't removable so I'm basically stuck with it. 

For $40 I can't really complain, and it's nice to have a comfy place to sit while one of us is sitting at the desk and the other wants to chat.  The dogs also loooove this couch (it's very low to the ground), so maybe it's better that it's cheap and we don't really care if it gets ruined!


I guess Ikea is the theme of this office.  We use our beloved Helmer drawer unit for office storage.  We've had this piece for a while and it's perfect for office storage, especially since we've never liked desks with drawers.  We have every office supply imaginable (and some random accumulated junk) hidden away from view.


Arial view - since this room is so teeny it's hard to see everything!  I think in this photo I'm actually standing on a chair in the hallway.  Obviously this room hasn't been painted yet so you can still see where we patched up the doorway to the garage.


Alas, this is the state of my closet doors, still.  We removed the beat up mirrored doors as soon as we moved in, thinking "how hard could it be to find plain white closet doors?" 

The answer: really f-ing hard. 

We found the perfect ones at Home Depot, only to figure out they had been discontinued (thanks Home Depot guy who gave us the pamphlet to take home and drool over).  We honestly can't find anything in between cheapo looking plastic doors, and $400 (each) custom made wood doors.  Sad face.


Another view!


Aaaaand another!  I was playing around with camera settings on my Nikon D40 this day, so I have a million photos of the same thing.

What do you think of our new office?  I'm loving it, it's already such a clean and inspiring place for me.  I have some ideas up my sleeve for office decor.  This was also one of the rooms Sean painted for me while I was away, so stay tuned to see what color we chose!  We actually picked the color ages ago when we moved in, so it was a surprise to us, too.

Tuesday, June 28, 2011

My husband, the rock star

This is a boring, no picture post because I'm at work (oops, don't tell), but I had to share what an amazing rock star my husband is.

I left LA on a red eye in the wee hours of Thursday morning to spend a long weekend in Connecticut and New York for some family visiting and a bachelorette party/bridal shower.  Sean stayed home in LA since he didn't finish work for the summer until Friday, and bachelorette parties aren't really his speed anyway.

When I talked to him over the weekend, he kept mysteriously mentioning a surprise.  He had mentioned possibly tackling painting the office while I was gone, so I was cautiously optimistic to see some fresh paint when I got home.

Flash forward to late Monday night, when Sean picked a somewhat cranky Julie up at the airport after a long trip and a stressful delay in Dallas where I almost missed my connection.  To my surprise, there was a toilet in the back seat of the Civic - in a box, of course.  Sean told me that he had planned to replace the leaky and old (and probably horribly inefficient) toilet in the main bathroom, but at the last minute on Monday the plumber recommended switching toilets so it wasn't done yet.  He said he was hoping to surprise me with it but it just didn't work out.  As a side note, I think it's funny that after 8+ years together and buying a home, a new toilet counts as a special surprise...and it really was, I'm super excited to get a new toilet with separate flushes for #1 and #2. 

I also figured that this was the mystery surprise Sean had been referring to all weekend.

Then we got home.

And I discovered that Sean had:
  • Stained the entire new fence a beautiful dark brown color (a job the contractor had quoted us $1-2k for)
  • Painted the shiny silver fence supports
  • Painted the ugly brick hearth in front of the fireplace (an idea I had and thought he didn't like)
  • Painted the office (including the trim)
  • Painted the guest room
  • Painted a bunch of yellowed trim in the living room
  • Painted over the LIME GREEN paint in the bathroom (which apparently took a coat of primer and 3+ coats of paint)
  • Done an insane amount of nail/screw removal and spackling to complete the above
  • Given both doozins a much needed (and much cute) summer haircut
I was/am seriously SHOCKED.  Did I mention his summer vacation only officially started on Saturday, meaning he was literally working non-stop to complete all of the above in THREE DAYS before I returned home from the East Coast.  Wow, just wow.

I am a lucky lucky lucky girl.

(and is it bad that I kind of want to book another trip next weekend so I can come home to more surprises?)

Pictures of the above, as well as other updates, to come as soon as I unbury myself from work after taking 3 days off.  Blogging right now is not helping.

Thursday, June 23, 2011

Creating an office

After making some progress on the areas of the house where we spend most of our time - the master bedroom and the living room - we're starting to branch out to the other rooms that have previously been ignored, aside from guilty glances.


Toward the top of our list was setting up a functional office.  Well, when I say "top of the list," I actually mean kinda toward the upper half of an insanely long and intimidating list, somewhere between "paint over the awful lime green bathroom" and "are we someday going to have a yard that doesn't consist primarily of dirt?"


In any event, having a good work space was important.  Even though I'm only an easy 10 minute drive from my office, I end up working from home quite a bit because sometimes it's just nicer to be at home in the late evening or weekend when I have work to catch up on.  I consider myself fairly lucky as a young lawyer not to be crazy insanely busy, but a "normal" week still involves logging 40 billable hours - which means I'm actually spending about 50-60 hours each week staring at my boring office walls. 


Effectively working from home at our last apartment was just not possible.  Since our main living space consisted of essentially one open room, there was nowhere private and quiet to go, especially if Sean was home and wanted to watch TV.  There was also nowhere to put a decent-sized desk, so on the off times I worked at home I'd usually be in some awkward position scrunched up on the couch with books spread around me.  Not good.


So, one of the things I was most excited about in the new house was the idea of having a designated office space.  Dorky, I know.  We thought the layout of this house was a great fit because it had three bedrooms (a lot of houses we looked at had 2) and even though the third one was tiny, it was big enough for an office or a future nursery/child's bedroom.


Now, when I say tiny, I mean tiny.  This room comes in at a whopping 8'x11'11".  It has a smallish closet, which is actually where I keep all my work clothes since our master closet is fairly small.  Sean has dibs on the closet in the other guest room, which works great for now.


If you've checked out our "before" pictures, you'll remember that the previous owners had knocked a doorway into the wall of this bedroom.


It's hard to tell from this photo, but having 2 doors in this small, narrow room made it feel like a wide hallway with a closet.  It felt much smaller than it actually was.


Where did this door lead?  To the garage turned 4th bedroom, of course!


We quickly converted the garage back into a garage immediately after we moved in.  Although the previous owners drywalled and put some carpet down, it was a yucky "bedroom."  Not to mention it was all done without permits.  We decided we would much much rather have a functioning garage than a 4th bedroom we would never use.


We pondered keeping the doorway open so that we'd have direct access to the garage from the house, but eventually decided to close it off.  Although it would be nice to have direct access, it seemed strange to have an entrance from the garage into a bedroom.  Plus, as I mentioned before, the door made it look much smaller than it actually was.


So, we paid the guy who refinished our floors for us $250 to fill in the doorway - put up drywall, plaster off, etc.  This was something I think we could have done ourselves, but with so much work to do and only 2 of us to do it, the cost-benefit analysis weighed in favor of having someone else do this.  Plus, we wanted it done quickly so that the house was sealed off from any dust and debris from the garage expansion that would be going on.


Once the room was all closed off, it became a storage room for all of our odds and ends and boxes from moving.  It was really a mess.  I don't think I have any pictures of this stage because it was really just ugly and stressful for someone as type-A as me to look at.  Just imagine a small room with a big mess and lots of random crap thrown everywhere that we didn't have a place for yet.


We were in no rush to set anything up because we really had nothing to set up - no desk, no office furniture, nothin'.  We had a couple of Crate and Barrel Sloane leaning desks from our old apartment, but they didn't work in the space so we sold them on craigslist.  We casually looked around for desks for a while, but with so much else to find it wasn't a top top priority.  Our big requirements were that it was big enough to spread out our stuff on, big enough for 2 people to sit at (although we rarely work at the same time), and I we both wanted a fairly simple design.


We saw a few that we liked but weren't crazy about, and I had it in my mind that I'd like to try my hand at building one if possible.  I wanted to build our dining room table as well so I thought this would be a good starter project.  Still, like I said, this wasn't a top priority so I wasn't even thinking of different plans or designs, and I definitely wasn't anywear near the purchasing materials stage.

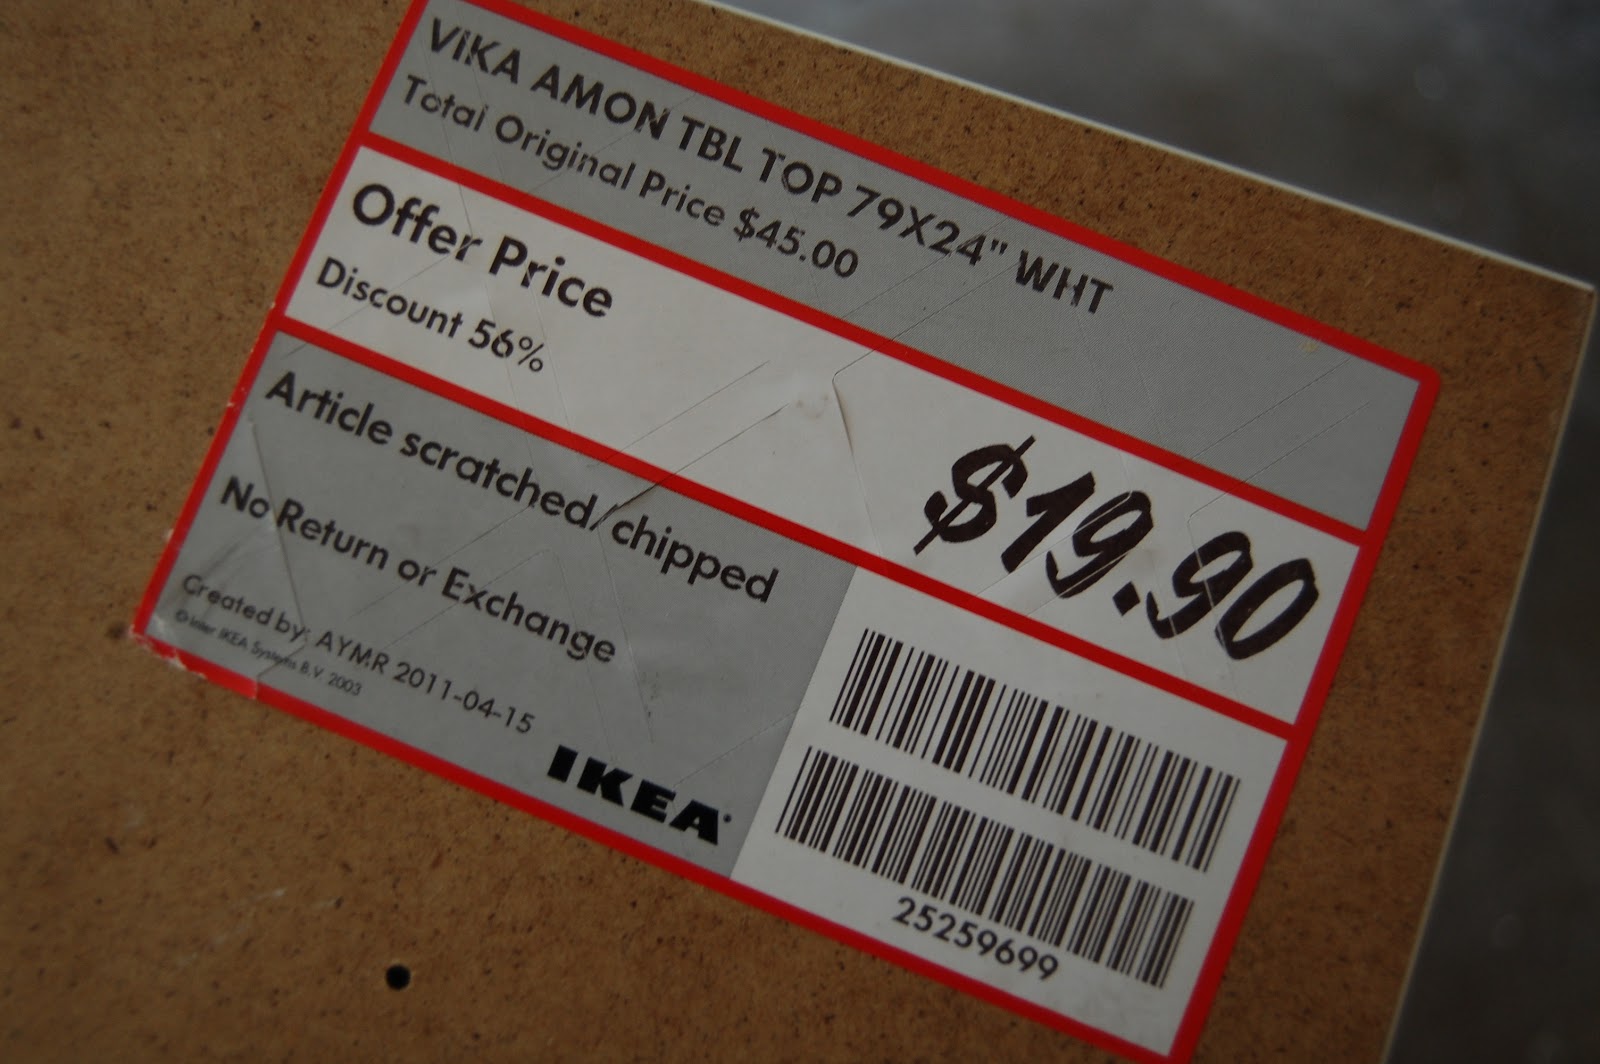
Then, on a trip to Ikea, I was poking through the as-is section (a dangerous obsession) and saw a stack of HUGE white vika amon tabletops.  They were all marked as scratched and dented, but Ikea must be pretty picky because most of them looked perfect.  Best of all, they were cheap!  Just $20 for a huge 79"x24" tabletop that was originally $45.


As soon as I saw them I started thinking about the desk I could build.  I immediately thought of Young House Love's DIY desk project and thought the Ikea vika amon top would be a perfect substitute for the old door they used as their desktop.  The vika amon isn't solid wood and has a plastic-y finish, but I thought this was perfect for a desktop because it's easy to clean and not easily dented.


I ran to Sean with my desk building idea, and his immediate reaction was to think I was a little crazy.  I mean, who sees an Ikea tabletop and thinks "I could totally build something with this!" rather than "gee, I could just go buy the legs that come with this."  Ikea does have a wide range of legs for the vika amon tops, but none of them were really what I had in mind.  I love me some Ikea but I just can't get behind their desk legs - we had 2 super ugly vika amon tables in our first LA apartment that I ended up hating and I think I'm scarred for life.


Anyhow, Sean told me that I was crazy to buy a random huge desktop without a plan, and I actually left the store without it...before having a change of heart in the parking lot and running back in to grab one.  I'm pretty sure I looked a little crazy carrying a 79" table top out of the store by myself (I'm only 61" tall), but when I put my mind to something I'm pretty determined.


The lovely tabletop home made it home in our little Civic...and then sat in the future office undisturbed for quite a few weeks until I mustered up the energy for my desk build.  

The hardest part of the actual building process was finding the right wood.  The YHL plans called for 3x3 legs, which I couldn't find anywhere.  I went to a local lumber yard, and the smallest they had were rough looking 4x4s.  Home Depot was the same, so I ended up buying some 4x4 pine fence posts, which actually measure about 3.5"x3.5".  Some of the posts were really rough wood, but a very nice Home Depot employee helped me pick out the best looking ones from the stack.  I also grabbed some 1x3 pine boards, which were much easier to find.


The total lumber cost for this project was MUCH lower than I anticipated, I think because I bought the cheapo wood:


2 1x3x6 pine boards: $10.96
1 4x4x12 pine post: $12.48
Total wood cost: $23.44


Now, I'm not an expert at all, and I'm sure there's benefits to buying more expensive wood grades, but all I could find for the 4x4s was pine.  The only obvious downside is that they were rough cut, and also that one leg is now leaking sap through a coat of primer and 3 coats of paint.  Hmm.  Otherwise, they're great!


I had Home Depot cut the 4x4s to size for me, but I kept the 1x3s at their pre-cut length since I needed exact cuts and could easily cut them with a handsaw at home.  I decided on 28" for the 4x4s since we have another table about this height and it works.  Very scientific.


I had everything else I needed at home - my Kreg Jig Jr. for attaching all the pieces, and primer and white paint for the final project.


I got to building pretty much right away, and got almost no progress pictures.  I need to start taking more pictures when I'm building, but I'm usually just focused on not drilling through my hand and forget to grab my camera.  There were workers at our house building the fence as I was working on my table in the garage, and I think I was entertaining them with my building skills.


Here's a quick rundown of my process:


1) Sand down the 4x4s.  Since the wood was pretty rough, I spent some time with my electric sander smoothing it down so that the desk wasn't so rustic looking.  I didn't need perfection, but I didn't want them to look so funny next to the sleek top.


2) Prime all the wood - I think paining is much easier when everything is laying flat and hasn't been attached yet.  I primed the night before to give everything plenty of time to dry.  I don't think you need this much time, but I thought I'd get the priming out of the way one night after work.  I used leftover Kilz oil based primer from the guest house painting (which was a little bit too dry, I think, and actually left pretty bad brush marks).


3) Measure out where I was going to screw in my legs.  This was a big issue with the Ikea vika amon tabletop, because I'd been googling and discovered that the table top is actually hollow and filled with some kind cardboard.  Not exactly conducive to drilling into.  However, there are certain re-inforced portions of the tabletop where the Ikea legs screw into, so I figured I could screw my legs into approximately the same locations that the Ikea legs were supposed to go.  Each leg ended up being inset about 3/8", which is what I wanted anyway.


4) Figure out which leg was going to face which way.  Since my 4x4s were still a little rough and dented after sanding, I figured out which way I wanted them each to face so I could hide the worst defects in the back.  I just marked with a sharpie on the bottom of each leg so I wouldn't forget. 


5) Pet cute assistant.


6) Drill my 4x4 pocket holes with the Kreg Jig Jr.  I drilled 4 holes per 4x4 - 2 holes each on the 2 inward-facing sides of wood.


7) Screw the 4x4s into the desktop, hope it doesn't crack (it didn't!).  I must have guessed correctly as to where the reinforced portions are, because it seemed very solid.


8) Measure the length I needed for the 1x3s to fit between the 4x4s, then cut to length and drill 2 pocket holes on each side to screw into the 4x4s, and evenly spaced pocket holes on the top inner side to screw into the desk.


9) Screw the 1x3s into the 4x4s, and then into the desk itself.  I'm pretty sure at least some parts of the 1x3s were screwed into hollow parts of the desk, but since it was re-inforced by screwing into the 4x4s it seems pretty solid.


10) Start filling in the pocket holes with wood putty.  Remember to take some pictures, even though it's getting dark.  You can see from the yellow wood putty areas where I drilled my holes.  I probably didn't need to fill all of these in because they're underneath the desk and not easily visible...but I'm anal.


Putting and sanding was probably the most tedious part, because it required a few applications of putty, then waiting for it to dry, then sanding.


10) Paint all the legs and supports with 2-3 coats of Fresh Aire semi-gloss paint in off the shelf white.  I used a combination of a small foam roller and a brush for this part.


The paint application wasn't super smooth, but I decided not to be a perfectionist.  I think the primer I used was a little too dry because it left lots of brush marks, but given that my 4x4s were already pretty rough I decided I didn't care.


I also realized at this point that the desktop was a different color from my paint, because all white paint is not the same.  Again, decided not to be a perfectionist.  As I've mentioned before, we got a bunch of Fresh Aire paint for super cheap ($5 a gallon), but I'm not sure if it can be tinted with regular tint so we're just using as much of the white as we can for now.  So, I can deal with a slightly mismatched desk for now and pretend like I meant it this way.


I've written wayyyy too much in this post already and I need to actually do some work in this office tonight, so I'll save the rest of the office reveal for a later date.  Stay tuned!

Thursday, June 16, 2011

Eek! Crazy deal alert!

So, I've been lusting after the overlapping squares headboard at West Elm for-ev-er.


So cute, right?

However, I never really needed it, and couldn't justify the price.  I considered the ana white DIY version, but it seemed a little tricky and I have more important projects on my list.

Well, I was browsing online today for some cute, cheap decorate accents since West Elm is having 15% off final sale.

Turns out the headboard was on sale in white, at $129.99 for a queen size.  Score!  After I added it to my cart, the total was around $150, which included the 15% off, but also a $40 in-home delivery charge.  I was a little indecisive still at this price, but it was still a great deal since the original price is $250 + tax and delivery.

Then, I ended up calling the catalog because I had a question about the measurements of a lamp I also wanted to order (remember when I said I was only shopping for cute, cheap accents?  Oops).

(This one, if you're interested)


...and the lady on the phone mentioned that they had an "in-house" special that made the lamp about $55, cheaper than the online price.  Score!

So, I asked her if there was a special for the headboard.

And get this.

The headboard price was $159.99, but with no $40 delivery surcharge, and she said she'd give me the extra 15% off.  Howeverrrrr, their "in-house" price is going down to $129.99 tomorrow, so she said as of tomorrow she can refund $30 to my credit card.

So the pre-tax total for the queen headboard I've been lusting after?

$106, including in home delivery. 

Crazy, right?!  Call and order yours before anyone else figures out the deal!

Guest House Quickie Update

When last we saw the guest house, the major work was done but there was a lot left to be desired.  Ok, well there's still a lot left to be desired, but we've slowly been working toward completion.

So far we've had 2 couples stay in the guest house (on two seperate weekends), and they all left rave reviews.  Well I may be exaggerating, but they didn't sneak out half way through the weekend so that counts for something, right?

In any event, one of my major goals was to find a table for the two lonely chairs that awkwardly sat in front of the window.


Since we moved from a 1 bedroom apartment to a 3 bedroom (plus guest house) home, we've needed quite a bit of furniture.  So far, almost none of our furniture was purchased from an actual store.  Instead, I use the handy dandy CraigsPro app on my iPhone to search for whatever item of furniture we're looking for at a particular moment. 

One of the benefits to living in a big city is that there's always a TON of stuff on craigslist that is located within a fairly small area. Since the volume of furniture is so high, I'm often able to search for very specific constraints, like the brand and model name of the specific piece of furniture I want.  The downside to this is that I'm almost physically incapable of paying full price for anything these days.

So, of course I turned to craigslist in my table search.  It actually took a little while for the perfect table to show up.  We wanted something (a) round; (b) small enough to not overwhelm the space but big enough for 2 people to sit comfortably; and (c) cheap.  There's a ton of tables on craiglist but it took a while to find one that met all of our requirements, and was located somewhere close-ish so we could go pick it up.

Finally, we found this sweet thing in Santa Monica, just a short drive away.


The table was $40 if I remember correctly, and it came with two bonus wood folding chairs that we're using for extra outdoor seating.  It's a pretty basic little table, but it has the added benefit of having fold down leaves to make it even more versatile in our small space. 

The table in decent shape - I wanted to refinish it but Sean wants to leave as-is.  Given that our to-do list is crazy long and guest house furniture perfection isn't our #1 priority (sorry, guests), it will probably remain un-refinished for a while.

A few weeks later we also picked up the little TV in the corner, which came with both a digital tuner and an iPod dock.  We could have gotten a non-flat screen for much much cheaper, but thought this was better for the space (and I think it looks much cuter).


We also added a Ikea mirror (from craigslist, duh) above the mantle - I keep meaning to hang it and keep not getting around to it.

Are you spotting the almost hidden dogs in all of these photos?

I want to get a cuter piece of furniture to rest the TV on, but the blocky Ikea nightstand was what we had on hand for now.  This beautiful piece of furniture was actually pulled out of the trash pile at our old apartment complex.  Just when you thought we couldn't get any classier than craigslist.


My special photo assistant tried to make sure that the bedding was wrinkled in every shot. 


This is Petunia, by the way.  She's a foster doozin from Perfect Pet who is staying with us until she can find a family who will appreciate her smooshy little puggle face.  She's rarely still so this picture is kind of a miracle.

So - that's a quick update on the guest house for now!  I'm still on the lookout for some cute replacement furniture, more decorative accents, and replacement blinds, but those will happen...when they happen.

Monday, June 13, 2011

On the Fence - the Sequel

Forgive the lack of posting, there's been lots of updating going on around here but I've been lacking the motivation to post about it.  It actually took about an hour to write that previous sentence after opening this browser window, eek.

You may remember that one of my first posts right before we closed on the house almost four months ago (!) detailed some of the changes we planned to make to the front of the house.  Two of the big budget items on our list were replacing the garage door, which wasn't functioning and probably wasn't worth fixing, and replacing that awful front fence.

We'd planned to tear down the termite-infested fence right when we moved in, but got a little sidetracked.  We definitely wanted to use a professional for this project - although I'm sure we could have figured it out on our own eventually and saved some money, it definitely wasn't worth the hassle when we could hire a trained professional.  Not to mention that there was probably about a 70-80% chance that our home built fence would probably have looked super crooked and weird.  And installing our own garage door?  Yeah, I don't think so.

Once we picked out a contractor it took a few weeks to get a quote and get moving, so we finally started construction a little over a month ago.  First on the agenda was the new garage door.  Since the old garage door was about 1.5 car size and we own more than 1.5 cars, we decided to expand the opening to see if we could squeeze in a bigger door.  Luckily, there was a little room to expand on each side of the door.  It looked kinda cute (if somewhat dilapidated), but we thought being able to park 2 cars in the garage would be cuter:


Now, I've learned to really not stress out about a contractor's schedule, because things seem to just get done...whenever.  The contractor was able to get in right away and start the expansion, but the garage door guy wasn't available until the next week.  Why they didn't figure this out ahead of time is beyond me, but like I said, trying not to stress out about these things.  So, for a week, this is the lovely sight that greeted us each time we drove up to the house:


Nothing says classy like a plywood garage door!
Same goes with the fence.  After the original fence was torn down, they were nice enough to build another super classy temporary fence to keep the dogs in during construction.  Once it was up it stayed up for a little longer than I would have liked while they poured concrete for the fence posts, waited for it to dry, and then I think waited a few more days just for good measure.


It was amazing what a difference it made to not have a 6-foot fence surrounding the property.  I'm honestly not sure we would have bought the house without it.  We're on a fairly busy road, and it just felt very open and exposed not having a fence out front.  Maybe it's just because we're used to it, because lots of the houses on our street don't have fences and seem fine with it, but it just felt very, very strange.  It felt weird that anyone could just walk right up to our house, although I suppose that's how the majority of houses are, I've just gotten used to living in a compound.

After a few days, the fence builder settled in, along with an endless supply of Christian rock blasting from his boombox (true story), and things started to take shape:


And theeeeen - after weeks of construction and tweaking and waiting and more construction...


We have a new fence and garage!  Let's take a look at where we started, shall we?


I probably should have tried to take these pictures at the same angle, oops.  I'm also wondering how we managed to let that patch of grass out front die so quickly?

Here's some more redwood eye candy.


I actually don't love the look of redwood, but we've been told it's the way to go in Southern California since termites don't like to eat it.  I'm hoping it will look less uneven and stripey once we stain it.

We still obviously have a look of work to do as far as the super uneven brick and bleak landscaping.  There's also a few touch ups left to do on the fence and garage.  I want to paint the metal post supports because although they're super sturdy, I think they kinda stick out and look a little too industrial.  We also need a mailbox cover slot thingy, so I ordered this baby from Amazon and she's on her way to us as we speak.

Oh, and we're going to stain the whole thing eventually to a darker color.  The quote from the contractor was a little ridiculous so I think we're going to attempt the staining ourselves, and see how it goes.  I've read that you're supposed to wait for the wood to...I don't know...settle? a little before staining so I think we'll do that.  Plus we've been kinda lazy lately so waiting to stain the fence just seems like a good idea.

So, that's the biggest update we've had going.  We're digging the results.  I was a little worried at first because we didn't give the contractor too much guidance, which I think is something we need to work on in the future.  I think we're both so used to trying to be nice and accommodating we forget that we're entitled to be picky when we are paying someone a ton of money to work on our home.  It's also tough sometimes to make a decision and have  design plan when it seems like there's 15 projects going on at once and we want to keep moving forward.  The only thing I would maybe change would be to make the supports on top of the fence thinner, although I suppose this is a fairly easy fix.  I like the way it is now and it's probably sturdier, so we'll probably leave it as-is for now.  I'm hoping it'll all come together when we put on a coat of dark stain and put the finishing touches on.

I was just looking back at my original fence post, where I said I was hoping to spend under $1,000 on the new fence.  Ha!  I've learned that it's totally hard to predict construction prices when you've never done this kind of stuff before.  How the heck am I supposed to know how much wood costs?!?  The total ended up ringing up at $2,000 for the fence after some haggling.  The main fence is about 28 feet long, and I later learned that $50 and up per linear foot is pretty standard for a custom fence.  The $2,000 figure included taking down the old fence and removing all the trash, so we're pretty happy with the cost.  This was something we knew we'd have to do when we bought the house, so we budgeted for the cost and it wasn't completely unexpected.

And so ends the first chapter of our curb appeal saga.  Stay tuned for more!