Monday, November 28, 2011

Kitchen Update: Part III

Ok, it's the moment you've all been waiting for! Yep, all 3 of you.

At long last, our mini kitchen re-do came to a close. Putting the cabinets back up and installing the hardware was almost as horrible as taking them down. In all honestly, I am very impatient and often have poor attention to detail when it comes to home projects, and so the detail work on these cabinets was not fun. And I couldn't for the life of me figure out how to screw the self-closing hinges into the wall correctly. And a few of the handles are unquestionably crooked. And some of the doors don't line up so they don't close properly.

But, it's done! Horray! I told myself that I may fix some of the above problems sometime in the future, but I'm not holding my breath.

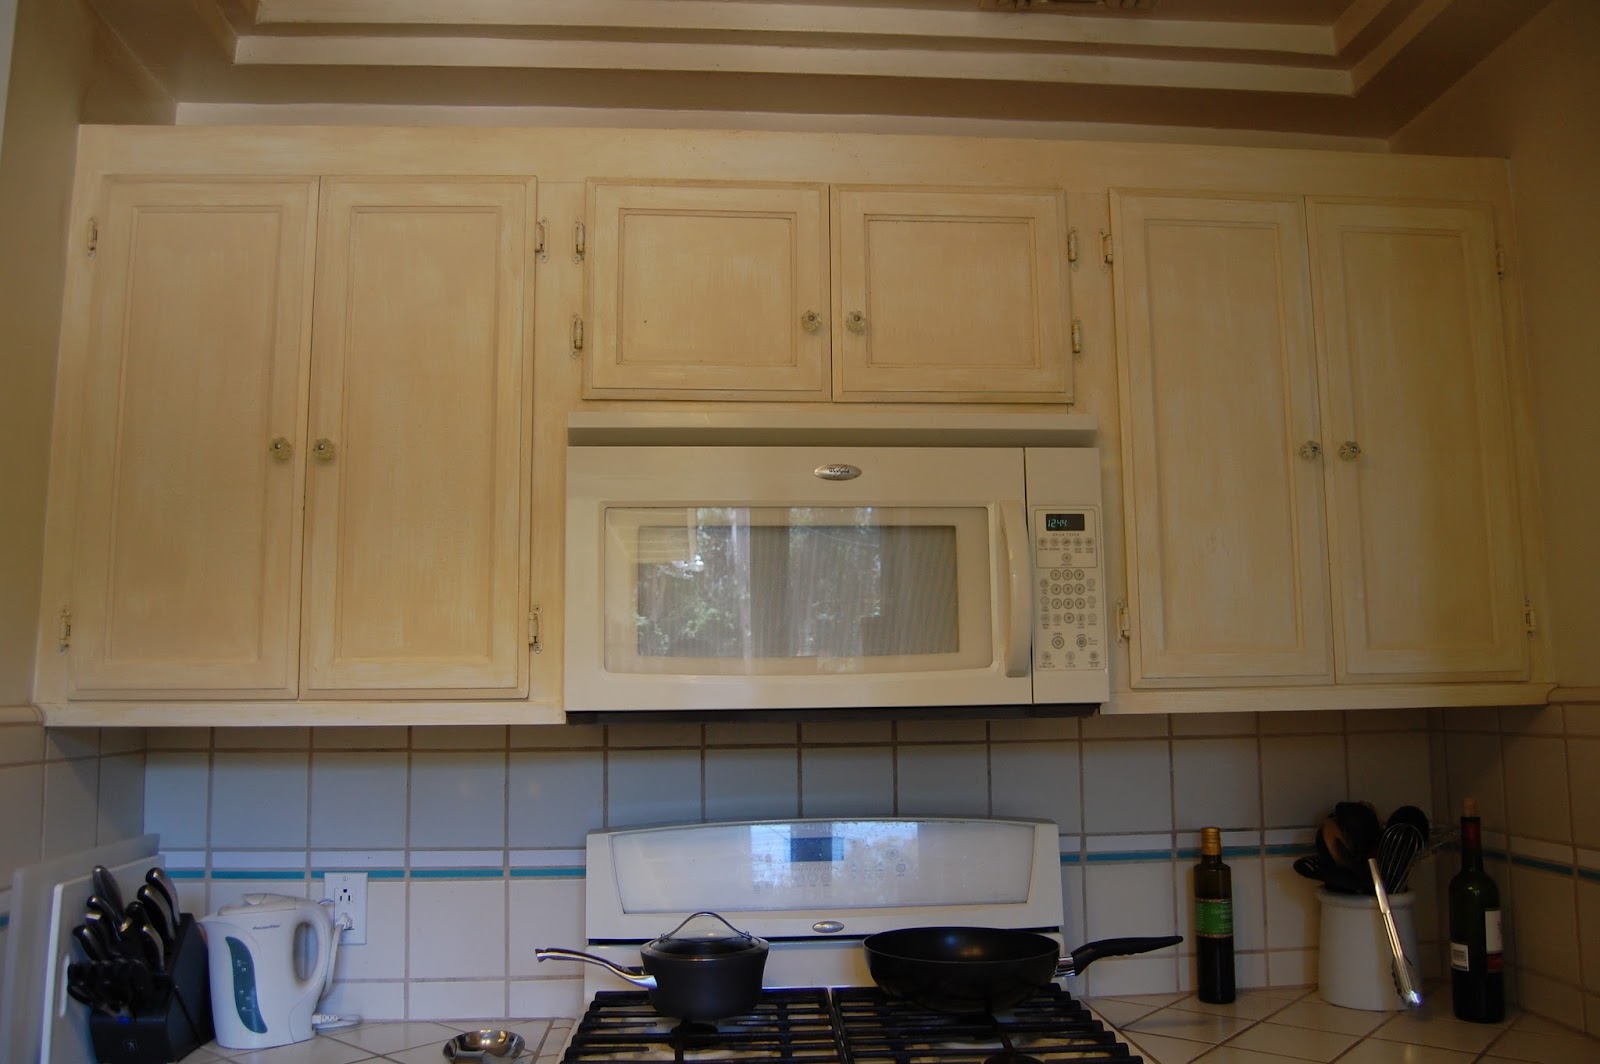
And so, the after photos. I'm sticking them side by side with the before photos from (sort of) similar angles so you can really be amazed by my handiwork.  I'm actually not pleased with how these "after" photos turned out, the lighting was funny and such, but I really don't feel like re-taking them.  Sorry guys.


I reallllly like how the wall paint turned out.  It's the darkest I've ever painted a room, but I think it works with the white cabinets and stainless steel.

Notice the lack of gross grease stain on the ceiling?  Hours of scrubbing.  Not even exaggerating. 


The off-white microwave looks pretty bad next to the shiny white cabinets.  We're casually looking at a  new stainless steel one, but it seems a little extravagant since the white one works just fine.  


Ok so that bottom cabinet is a little crooked and I didn't close it all the way.  Oops.


I have since hung curtains.  I should probably update more so my posts aren't immediately outdated.


Our Miele dishwasher has a removable cover thing that we could replace for a stainless steel one, but I think it looks fine just painted white. 


Gross story - we thought the glass on this light was off-white.  Nope.  It's white.  It was just horribly dirty.  Also don't love this light fixture, but it's fine for now.


Close up of the paint and tile matching.  I like it.

So, that's it for the mini kitchen update.  It's still not perfect, but the total cost was only about $150 for cabinet hardware and paint (and a good chunk of my sanity).  The result is SO MUCH better than the kitchen we moved in to, and so if we don't get around to a full kitchen reno soon (or ever), I think we're both OK with that.

In the meantime, I've slowly been accessorizing and trying not to go too crazy with turquoise theme - you can see some of my wish list at http://pinterest.com/juliemarianne/kitchen/.

That's all for tonight - I hope you like the (sort of) new kitchen as much as we do!


Kitchen Update: Part II

Last I left you, I shared some scary "before" photos of our kitchen.

As I said, a dream motivated me to get going on the updates.  And I guess Sean didn't have a similar dream, because he wasn't completely behind me on this one.  He thought that we should just live with the new kitchen until we save up for a full renovation.  So, I was mostly on my own for this project.  Which was fine.  Except for the parts that I cried.  But other than that, totally fine. 

I won't go into the cabinet handle and hinge selection process, because it was an amazingly long and hideously boring process.  The executive summary is that we paid about $64 for all the handles at Kitchen Cabinet Hardware, and about $53 for the hinges at Home Depot.  Just know that there was a near mental breakdown on my part involving driving around LA looking for the right hinges, only to end up using the ones we bought at Home Depot to begin with.

Anyway, after we picked out all the hardware, I got to the fun part - cabinet dis-assembly:


That's a lie.  It was fun for about a minute, after which it started hardcore sucking for the entire weekend.

Step one was to remove all the cabinet doors, and take off the old, rusted hinges.  This went kind of terribly, because a bunch of the screws holding in the hinges were so old that they just snapped off half way or totally stripped.  So I ended up having to drill out the centers of a bunch of screws just to pry the hinges off.  So.  Much.  Fun.


 Bag o' hinges


Pile o' doors

At least it was a nice weekend, so I did as much of the work as I could outdoors.

I also removed all the old handles and saved them in a zip lock bag...I'm not sure why.  I have no idea where that bag is now.


Then came the sanding.  This was almost definitely the worst part.  First I had to fill in all the old cabinet holes with wood filler (since we were putting on a whole new type of handle, the old holes wouldn't line up) and wait for that to dry.  That part wasn't too bad I guess.

The bad part was sanding the surfaces smooth.  Since the horrible yellowy brown paint of death had a texture to it, I wanted to sand it as smooth as possible before adding my white paint.  This took absolutely forever and was horribly messy and loud and everything else bad.  


I used a combo of my Black & Decker sander and a hand sander, and it was really atrocious.  We have 8 tall cabinet doors, 10 short cabinet doors, 8 wide drawers, and 2 small drawers.  That's 28 surfaces that needed to be sanded.  By yours truly.  This took a good chunk of a day, and it was pretty miserable.  By the end I was super achey and sore from hunching over cabinet surfaces sanding for hours on end.  There's not really many pictures of this step because I tend not to take pictures when I'm miserable.  I was honestly ready to give up the project at this point, if not for the fact that our entire kitchen was dis-assembled.


Cabinet doors, waiting to be sanded.


Then it was on to priming.  I bought a gallon of Kilz primer for about $19.  I can't remember if it was oil based or water based.  All I remember is that I accidentally bought the opposite of what I was supposed to.  So, if it was supposed to be oil based, I bought the water based.  Or vice versa.


I covered all the outdoor furniture with plastic drop cloth and started priming the surfaces outside.  It wasn't until I started painting that I realized for the first time how many leaves randomly rain down from the sky in our back yard.  Crazy leaf action.  I soon realized that unless I wanted some kind of leaf-effect cabinets, I should move the operation indoors.  Boo.


As you can hopefully see, it was pretty exciting how much better the cabinets looked after just a coat of primer.  I think this was probably the only thing that kept me going.


Since the leaf conspiracy thwarted my plans for outdoor painting, I covered the floor of the guest house (which was luckily unoccupied) with a plastic drop cloth and moved the whole operation indoors.  The cabinet doors and drawers really covered almost every inch of the guest house floor, so I left myself aisles and just scooted around on my butt from door to door painting.


As far as painting technique, I played around a bit to see what would get me the smoothest finish.  I ended up using a paintbrush first to tackle the corners and molding, then used a small foam roller for the flat surfaces, and to smooth out any brush marks I could.  I used this technique for all my layers and it came out well, if I say so myself.

Our paint search led me all the way to our garage, where we have a stockpile of Fresh Aire paint in off-the-shelf white that we bought on clearance for $5 at Home Depot.  I'm positive this was not the best brand of paint to use and I probably could have researched something better.  But it was $5.  And we have a ton of it.  So on went 2 coats of Fresh Aire in semi-gloss over the top of the primer.


Then we just waited for the paint to dry.  Super exciting.  I think we waited about a full week.  A few days probably would have been fine, but I think I needed a week off from painting for my sanity.


In the meantime, Sean decided he wanted to help, so I asked him nicely to sand and paint the cabinet boxes for me, because I really didn't want to use the sander again for a good long while.


I'm sharing these photos because it cracks me up how Sean taped up the dropcloth to block dust from coming out of the kitchen.  Really?  I feel like a few long pieces of tape would work better than 40 short ones, but hey, that's just me.


I should probably mention that smart people probably would have tested their ancient kitchen cabinets for lead paint BEFORE sanding them down.  Somehow this thought didn't occur to me, and I only started panicking about possible lead poisoning after I'd spent a good part of the weekend inhaling paint dust.  So, I ordered a fancy lead paint test kit on Amazon, which I think arrived after the kitchen was almost done, and we discovered that the paint does not contain lead.  At least according to the $10 kit I bought.  Yay!


This is what our kitchen looked like post-cabinet box painting/pre-kitchen wall painting/pre-cabinet rehanging.


I have a really random assortment of photos from the kitchen update.  Here's some paint swatches!  I decided to go crazy with the kitchen since the cabinets are so white, and paint the walls a color that wasn't beige.  Ooooh!


I wanted a paint color that would tie in with the stripe of teal on the wall that I absolutely hate, so it would look like we actually planned everything...instead of the reality that we're too cheap to tear out all the tile so we're just working around it.

Stay tuned for some damn sexy kitchen pictures, coming sort of soonish or whenever this case I'm working on decides to stop destroying my life.

Tuesday, November 15, 2011

Kitchen Update: Part I

It's no secret that one of my least favorite parts of this house was is the kitchen.  It wasn't horrible (especially considering some of the kitchens we saw house-hunting...eek...talk about weird smells), but the paint job was just atrocious and it had obviously not seen a lot of love with the previous owners.  It's actually a decent size, but the layout is awkward and I don't like how it opens right through to the laundry room.

We've been going back and forth with what to do with the kitchen.  Down the road, we'd love to do a total kitchen renovation - new cabinets, counter tops, blow out some walls and close off others - the works.  However, given that this kind of reno is way outside our scope of expertise, it's not going to come cheap.  We've very conscious of the volatile housing market (we bought our house for $245,000 LESS than it sold for at the beginning of 2007), and we're almost certain this is not our "forever" home, so we're constantly weighing how much money we want to put into particular projects. 

We realize it's important to love the house we're living in, but it's also important for us to not spend all of our money on renovations that may amount to a sunken cost.  Given that the kitchen is functional as-is, we have to really make sure we're going to get at least a partial return our investment before we blow a few months salary on a full kitchen renovation.

That said, in the first 6 months or so we lived here, we've been toying with the idea of doing a kitchen face lift - new cabinet hardware, a coat of paint, and some easy fixes.  We already got a shiny new faucet when the old one crapped out on me during some late night painting during our first few weeks of home-ownership, so that was already $450 down the drain in spiffing up the kitchen - although I must admit, the new faucet looks MUCH better.

I sound like a crazy person, but one night in July I had a dream that we re-finished the kitchen cabinets, and it convinced me to move forward.  Somehow a dream was all I needed to kick my butt into gear and get moving. 

I'm going to be blogging about the kitchen facelift among a few posts since there's a lot of pictures, so I thought I'd start with the obvious - before pictures:


I'm not sure if these cabinets are original to the house, but they're pretty old.  And, the previous owners decided to paint them with a horrifyingly ugly paint treatment.  Thanks guys.  I tell people this and they never believe me from the pictures - but the paint was BAD.  It made me never want to go in the kitchen - I seriously didn't cook a meal in this kitchen for the first few months we lived here.  Oops.


The glass knobs were also just really not my style.  Plus they were super dingy.  Yuck.


We bought the fridge, which we love, at a great discount before we moved in, but it looks just a little out of place in the otherwise icky kitchen.  

The tile floors actually seem pretty new, so I don't even want to imagine what the floor looked like before that.  The tiles aren't totally my style, but they've decent.  Oh, and if you want to be really grossed out, shortly after this photo was taken I realized the floor grout isn't actually black, it's light brown.  It was that dirty.


The old hinges were just BAD.  Super rusty and half of them were bent so the cabinets didn't close properly.


Can you sense the hideousness of the paint??  Can you??


See the new faucet?  Fancy pants.  Also, you can totally tell that we put NO effort into this kitchen.  Thus the mismatched plant pots and crap all over the counters.


The over the range microwave doesn't vent properly, so you can sort of see the giant grease stain on the ceiling.  Seriously so gross.  The old owners I guess liked to cook with lots and lots of oil, and there were greasy drips all over the cabinets that took several hours of scrubbing by yours truly.  And see that bottom right cabinet?  The hinge was f-ed so it just refused to close.  Great for my OCD.

That's it for the "before" photos.  I'll be back soon with the progress and stunningly beautiful and life changing (this may be an exaggeration) after photos.

Saturday, November 12, 2011

More living room fun

I last shared some living room updates back in July, and we're being doing lots of shopping and tweaking since then.  You've seen my beloved new bar cart, so I thought I'd share some of the other new additions.


I've been searching for something to put over the fireplace forevah.  The room looked super bland without something there, but I'm horribly indecisive.  I was going back and forth between some kind of art/print, or a mirror.  

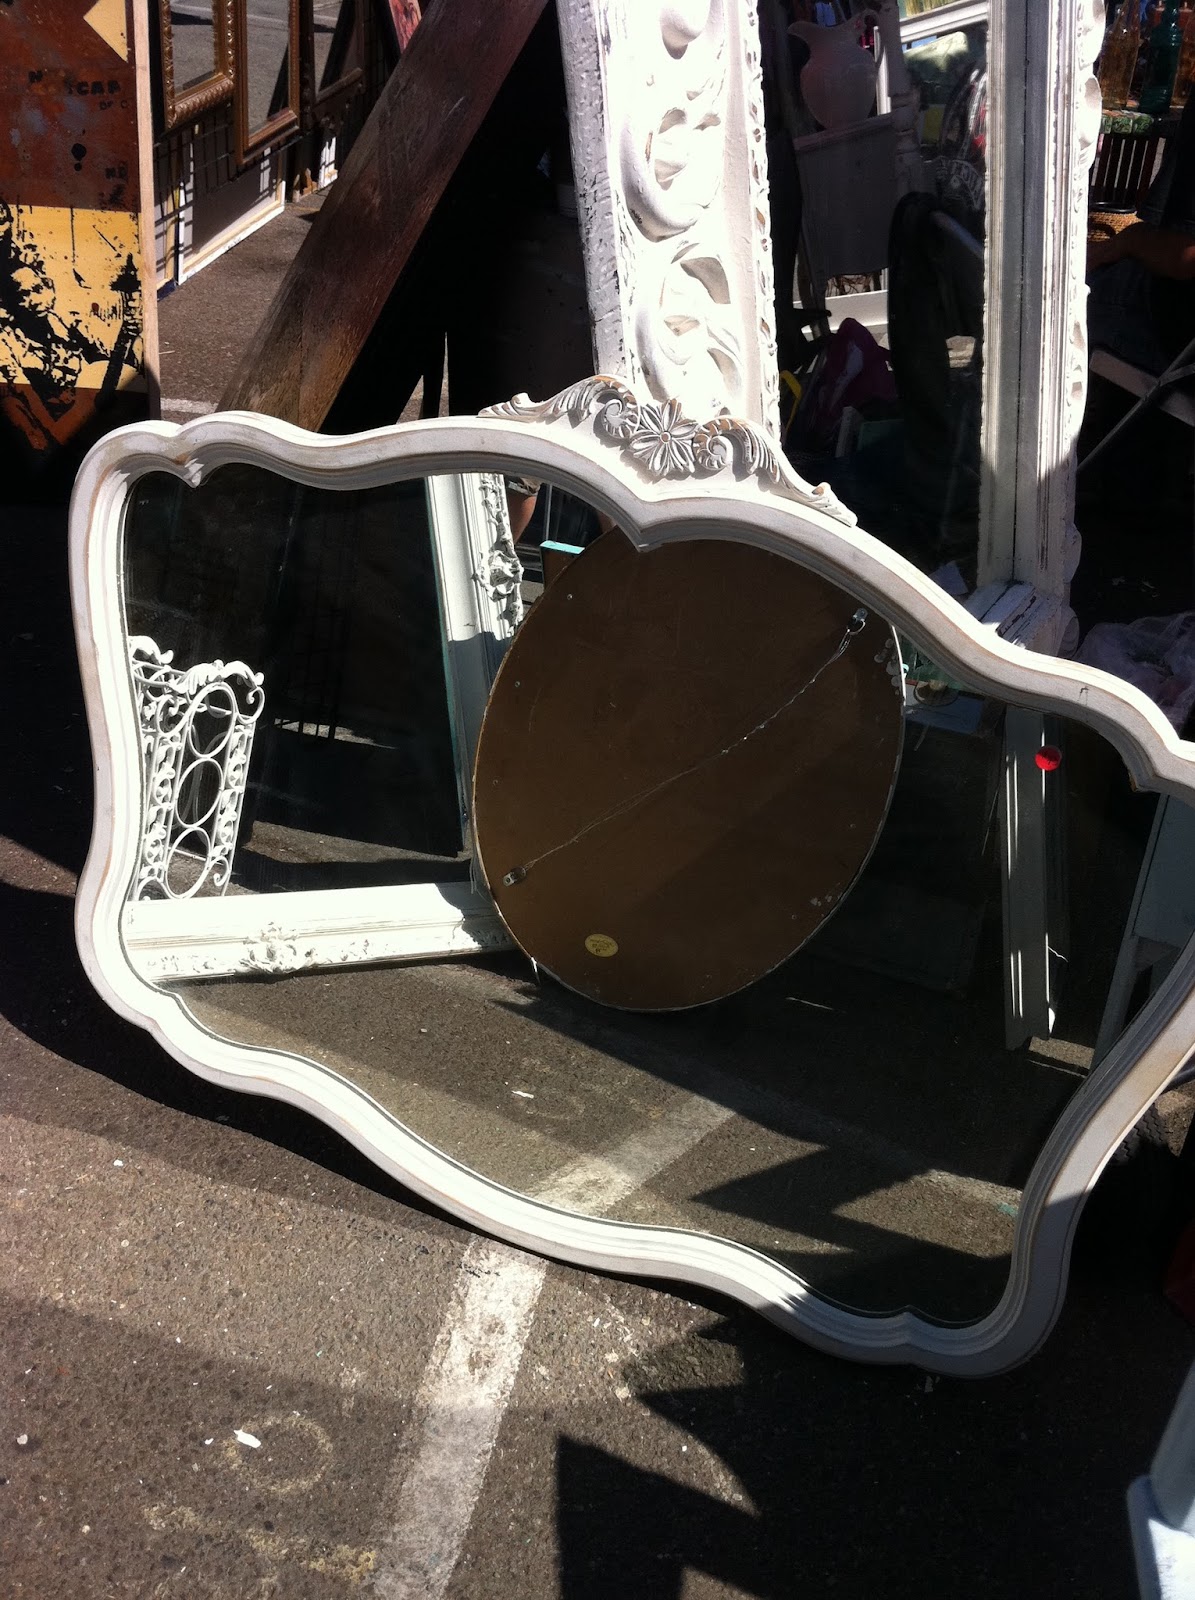
My mirror hesitation was that I've heard you should always have a mirror reflecting something interesting, and all that's across from the fireplace is our entertainment center, which is not interesting.  In any event, obviously the mirror won out.  I found this big antique gold mirror at the Melrose Trading Post for $60.  I've been hunting places like Ross and TJ Maxx for a big mirror,  but the Trading Post had an amazing selection.  Ooooh actually, I just realized I have pictures of the other mirrors on my phone from texting them to Sean...lemme upload those right quick...

Here are the runners up that I texted to Sean so that he could text me back that he didn't care, just pick a mirror already.


 Ok this is actually the one I bought, in its natural habitat.


I talked to the guy making these cool window pane mirrors about making a custom size for above the mantle.  Obviously I went with something else, but I think I need one of these in my house anyway.  Oooh maybe in the window-less guest room.  Great idea, Julie!

I ultimately decided that a heavy rectangular mirror was more earthquake-friendly than a round one that might roll off the mantle.  And plus some of these sold in the time I was wandering around.

Enough about mirrors, here's some more living room pictures.


Fireplace area taking shape.  I also recently snagged these votives on a naughty insomnia-driven online shopping spree at Urban Outfitters:


I dig them since we love lighting candles and don't have any cute candle holders.  HOWEVER, my biggest complaint is that they are called "Brass Lotus Votives" so I put a VOTIVE candle in them and left them unattended.  However, I guess you are only supposed to put tea lights in them, because everything in a 3-foot radius of these candleholders (floor, curtains, walls) was splattered with bright red candle wax after an hour.  Dammit.

Moving on...


 Mirror detail and a blurry shot of my messy frizzy weekend hair.  I was actually originally considering painting the mirror, but I'm kind of digging the gold.  It's different from  my normal color pallette which is good, I think.


Zoomed out view, with Mabel doozin.


Oh yes, I also purchased these chairs recently (actually, months ago, but I last blogged about the living room in July so as far as you know it's "recently").  They're a slightly older version of the curved upholstered chair from West Elm.  We were in desperate need of some chairs for this area of the living room, so in true Julie fashion I waited until West Elm was having a sale and then showed up to harass the sales people in Santa Monica with a handful of coupons and made them price match the cheaper online price.  Long story short, they were $127.49 each, down from the original price of $199.  I still can't get over how expensive chairs are.  Eeks.

That's all the living room updates for today.  This is the room where we spend most of our waking hours (watching TV and snuggling with the doozins), so it's great to see it finally coming together.

Now if only my dining room table would arrive...the West Elm website still says "expected delivery by November 14, 2011" but since it's November 12, 2011 and no one has contacted me about home delivery on Monday, I'm thinking that is a LIE.

Tuesday, November 8, 2011

Side effects of watching too much Mad Men

I recently started watching Mad Men on Netflix, and proceeded to blow through the entire four seasons in a just a few weeks.  Sean hates it, so I became best friends with my iPad and started watching an unhealthy amount of TV at every waking hour.

Then, after a few dozen episodes of watching the characters swill drinks and chain smoke in their awesomely retro 1950's offices (not to mention their mostly super cute 1950's clothes), I made a super logical conclusion - I NEEDED to find a bar cart.  Stat. 

It's honestly a little weird how much I started fantasizing about my bar cart.  I had a picture in my head of the perfect mid-century bar cart, stocked with all sorts of sophisticated liquor that I, a sophisticated grown-up, would consume.  Forget girly drinks, I was going to start drinking fancy aged liquor on the rocks.  People would look at me and bask in my sophisticated adulthood.  I'd have friend over and throw cocktail parties, where we could sip martinis and talk about...grown up things.

If I could only find the right bar cart, my life was going to change.  I was convinced.

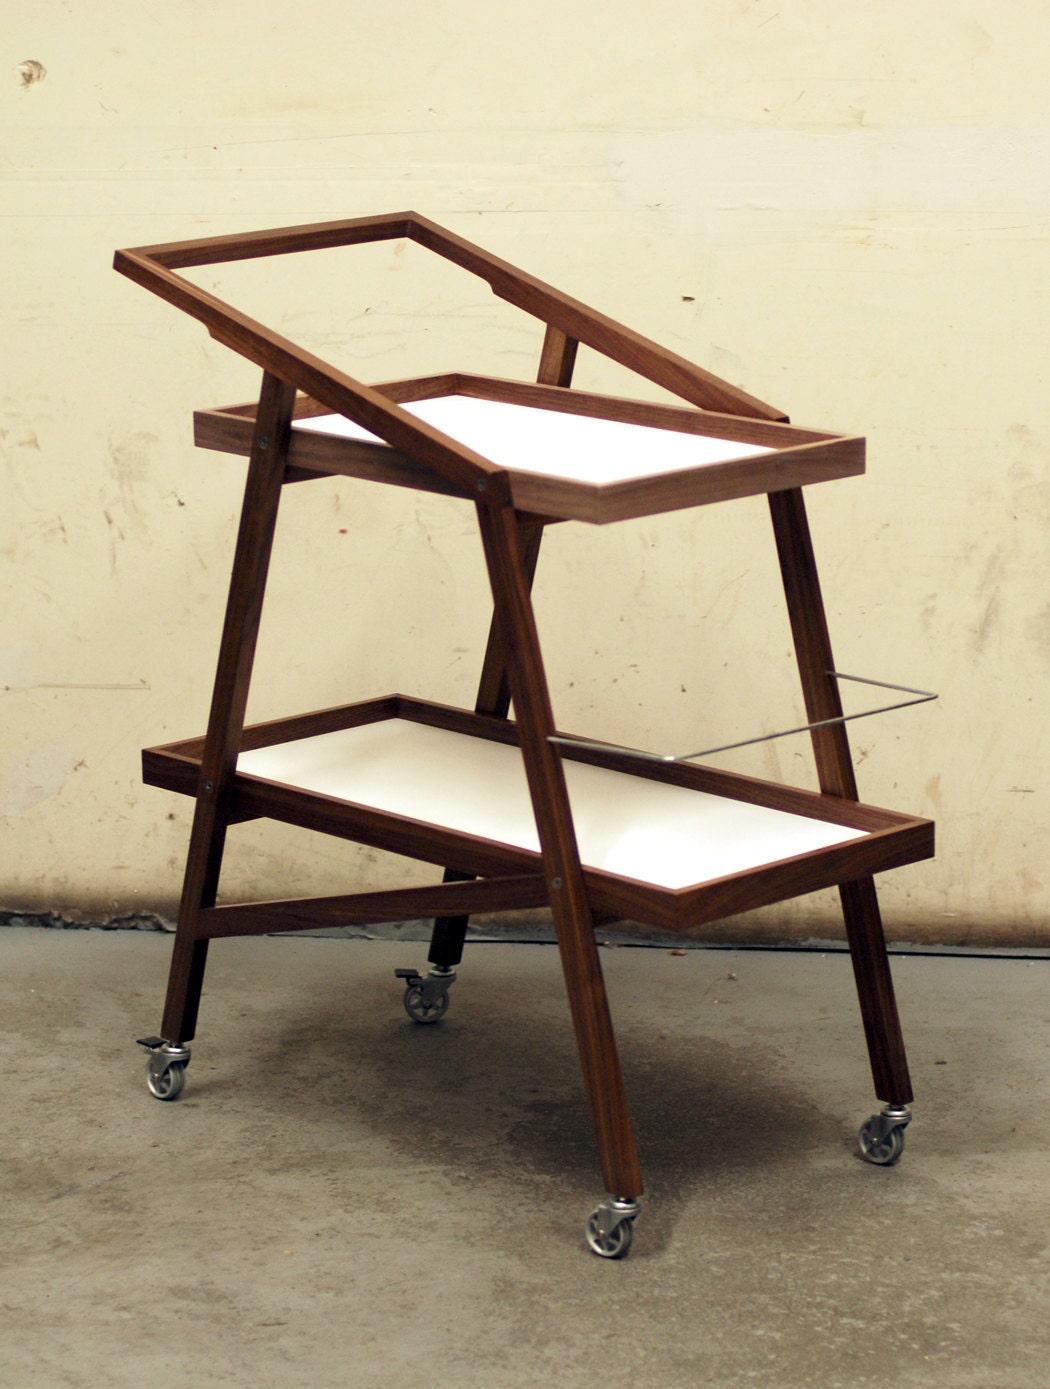
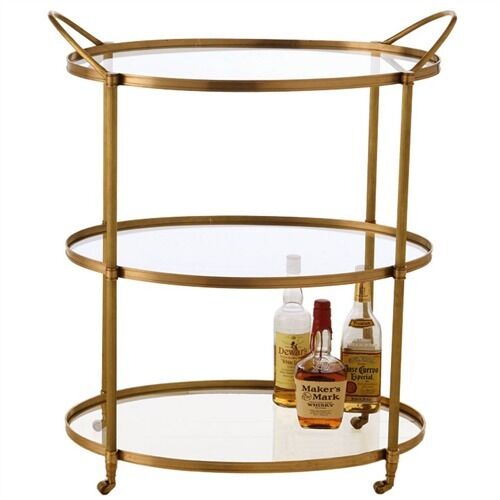
So, in between Mad Men episodes, I started browsing obsessing the internet for the perfect match.  Here's a few examples of my inspiration:

via etsy
$650


via ebay
$1099

via ebay
$190
All of these options would have worked perfectly.  Problem is, there's no way I was going to spend $1,000+ on a bar cart.  Or honestly, even $100+.  We have too much else to do and buy for this house, and a bar cart is just not something in the "need" column, despite what my inner fantasies might tell me.

So, I did what I do best and started obsessively trolling craigslist for the next best thing.  My searching was largely unsuccessful at first - things were either too expensive, or too hideously ugly.  I had a few "almosts" but nothing I felt strongly enough about to venture out and see.

Then, one day, I came across some craigslist ads for a vintage store in Long Beach called Magnolia and Willow.  Score.  Their pictures weren't that great, but the prices were very reasonable and they seemed to have a decent selection, and I just really had a good feeling about what I might find.

My first free Saturday, I tore myself away from the iPad and headed South on the 405 to check out this little hole in the wall.  And I'm definitely glad I did.  They had a really tremendous selection of all things vintage, and the prices were overwhelmingly reasonable.  I thought things were much more fairly priced than at the flea markets in the area, where people tend to know when they have something cute and price it ridiculously. 

The lady who runs Magnolia and Willow was SUPER friendly.  I found out that it's actually kind of a vintage superstore, and a bunch of sellers sell their stuff at the store, and the owner just collects commissions.  I overheard the owner talking to someone else about how running a store like this was basically her dream and she worked hard to make it a reality.  Very cool.  I think there's actually a few other vintage stores in the Long Beach area that I'll have to check out, but on this particular day my car was already filled with stuff.  More on that later.

As you might have imagined, I found a cart!  Actually, I found a few - there were 2-3 carts at Magnolia and Willoe that would have done the trick, but one in particular caught my eye.  It was a super retro kitchen cart that was covered with a bunch of vintage tool boxes tools, so the lovely owner helped me unbury it once I made my selection.

The price?  A super amazingly reasonable $29.

The problem?  It was a little rough.  


Excuse the picture - it's an iphone shot in the backyard in fading light.  As you can see, my quaint little cart was just a tad beat up and rusty.


I originally thought I'd rock the rusty chic look, but Sean wasn't buying it.  He doesn't always share my creative genius, and he thought this looked like something I pulled out of the garbage (um yeah, I WISH I pulled this out of the garbage).

Plan B = rummage through the garage for some spray paint.  I had found a can of white spray paint and a can of oil rubbed bronze (both Rustoleum) in the garage, and after deliberating for a bit on an all-white cart, I decided to try some kind of two-tone look.

I was so excited and impatient about my purchase that I actually did all the work on this the same afternoon I bought it - thus the fading light in the pictures.

Since the paint was chipped and rusty, I sanded the whole thing with some fine-ish sandpaper to smooth it out, wiped it with a damp cloth to remove the dust, then went to town with a few half-empty cans of spray paint.  I honestly just winged this whole project and it took a total of about an hour. 

My only in-progress picture is this incredible example of my perfectly taped off legs.  AKA, I found some newspaper and taped it on the legs in the sloppiest way possible.


I then did 4-5 coats of verrrrrrrrry thin paint.  I think I'm actually getting the hang of this spray painting thing.  When people say thin coats they mean THIN COATS.  

Through the magic of the internet, and after a day or so drying outside and a few confusing trips to the liquor store, here's what my $29 cart turned into:


Horray!

The top looks black, but it's actually the lovely oil rubbed bronze, so it has a subtle metallic shimmer, like so:


It actually needs another coat of white, but my can of white  spray paint ran out and I haven't gotten around to buying more.

So, that's how my bar cart dream became a reality.  Thrilling stuff.  And, for the record, it's totally turned me into the sophisticated grown up I imagined.  For example, I'm currently writing this post from the couch, wearing sweatpants that are covered in dog hair, the button down I wore to court this morning that I am too tired to change out of, and drinking a Corona. 

A girl can dream, right?

Tuesday, November 1, 2011

Exercising my patience

I am a horribly impatient person.  Just ask anyone who knows me.  I'll routinely jam insane amounts of furniture into my car just to avoid waiting for home delivery, and Amazon Prime with free 2-day shipping is one of the best things to ever happen to me (although one-day shipping would be even better).

Where am I going with this?

We've been living with the same, slightly sad, Ikea dining table (seen here in our old apartment) since we moved to LA more than four years ago.  This table has actually been awesome and held up remarkably for the price, but I just kept feeling like it was time to move on...and maybe, I don't know, buy a new table that actually has chairs that match.

So, since we got the house I've been scouring all my favorite furniture store websites for a table that would fit the bill.  Our dining area isn't huge, so I knew it couldn't be too big and overwhelm the space.  I also wanted something that was made with real wood (not veneer), and that was fairly chunky and not too modern.  Sean also digs benches instead of chairs, so the perfect table also had to have a matching bench option.

Enter the West Elm Carroll table


I kind of dug it.  And, at $499 for a 66" table, the price wasn't bad either.  But of course, I'm cheap.  Super cheap.  And I know that West Elm tends to cycle through sales, and it couldn't be too long before they had a 15-20% off dining sale, right?  So I waited.  And waited.  And waited some more.  Until finally - literally 6 months later - my dream came true and West Elm put all dining on sale for 20% off.  Yayyy!

Like a true nerd, I dragged Sean to the West Elm in Santa Monica the day the sale started, bribing him with promises of dinner.  I wanted to check out the table in person and make sure it was really what we wanted, since it's one of our biggest furniture purchases yet for the new house.  It was great in person, buuuuuut unfortunately I discovered that they don't carry the table in store, so I couldn't just grab the table that night and run.  SAD FACE.  Not just that, but we'd have to pay the insane shipping and delivery charges.  DOUBLE SAD FACE.  And it's on major back order.  BOO.  I tried to convince the West Elm employees to sell me the floor model but they weren't going for it.  They said my only chance of finding one was if someone returned one to the store, so I gave them my name and number, but I'm not holding my breath on that one.  I find the employees at that store to be incredibly apathetic, so I feel like they might have just thrown away my number as soon as I left the store.

Anyway, after a little more deliberation, I placed the order for everything online.    I tried everything I could to get an extra discount - including calling the 1-800 number but no dice.  I did end up signing up for a West Elm credit card (something I never do) to get 10% back in West Elm dollars.  Not too bad I suppose.  

The grand total for the set was $1156.01, which was a little shocking for a cheapo like me.  It was $424 for the table, $228 each for two benches, a whopping $183 for shipping, and $93 sales tax.

So now I wait.


I originally wanted to do half modern chairs and half bench like the pretty picture above, but Sean wasn't down for that idea.  So, I compromised and did 2 benches and no chairs.

The estimated delivery date for the table is November 14, but I've literally been checking the West Elm website every day to see if they change the date.  Dork.  No changes so far.  We actually got the benches a few weeks back, so they've been chilling in our living room awkwardly, waiting for their table.

I'm super excited about how the new table will transform the whole living area, so I'll be sure to update once the table is (FINALLLLLY) delivered.  I also have my eye on a new light fixture for above the table, but the cheapskate in me has to recover a bit before dropping the money on that...